Garage Door Opener Light Blinking: Which Light, What Code, Who Fixes It
A garage door opener light blinking is a fault code, and on a LiftMaster or Chamberlain made before 2022, 10 flashes of the main bulbs means the safety sensors are blocked or out of line. Count the flashes, note the pause, and the opener has told you which part failed. Four of the six LiftMaster codes are free to fix, and the other two are the ones that decide whether a 12-year-old opener is worth repairing.
Read it before you callPress the wall button once and watch the opener. Tally the flashes up to the pause, then tally again to confirm. Note which light is doing it: the big bulbs, the small LED on the back of the unit, or the up and down arrows.
Those three facts, the count, the light, and the brand on the label, are what the technician needs on the phone. Call (636) 577-1430 with them and the right part is on the truck.
Sensor pairs, wall consoles, circuit boards and drive gears ride on the trucks for the garage door opener repair service, and the quote is free. Our opener troubleshooting guide prices a sensor pair at $85 to $100 fitted, and the full span of opener repairs at $65 to $385.
Which Light Is Blinking? Count the Right One
Every page that says “count the flashes” skips the first question: which light? A LiftMaster carries three different indicators, Genie uses two more, and the sensors have their own. Count the wrong one and you read the wrong row.

Swipe sideways to see the whole table.
| The light | Where it is | Brands | What its blinks mean |
|---|---|---|---|
| The main bulbs | Under the lens covers on the motor unit | LiftMaster, Chamberlain, Craftsman made before February 2022 | 10 flashes: the sensors. 2 flashes: the LOCK button on the wall console is on. After February 3, 2022 the maker dropped the 10-flash signal from new units and boards |
| The diagnostic LED | A small light next to the square learn button, back or bottom of the unit | LiftMaster and Chamberlain AC units | 1 to 6 flashes, then a pause, repeating. The table below |
| The up and down arrows | Next to the antenna, Security+ 2.0 units made since about 2011 | LiftMaster, Chamberlain, Craftsman | One up flash then 1, 2 or 4 down flashes: the same sensor codes. 4 up and 1 down: the door hit something or is binding |
| A red and a green LED | Next to the learn button on the motor head | Genie chain-drive and belt-drive | Red: remotes. Green, 1 to 5 flashes: sensors, limits, wall console, chain tension or the board |
| One status LED | Under the lens cover | Genie Excelerator screw-drive | 1 to 8 flashes: boards, overheating, force, sensors, console, limit switches, lock |
| The sensor lights | On the photo eyes, 6 inches or less off the floor | All | LiftMaster: amber on the eye that sends, green on the eye that receives, both steady. Genie Safe-T-Beam: a steady red; flashing red means a fault |
The model label is on the motor unit’s side or back, and the brand’s own chart is matched to that number. What follows covers the two brands we install and service, LiftMaster and Genie, plus Chamberlain and Craftsman, which run on LiftMaster’s electronics.
What Does Each LiftMaster and Chamberlain Code Mean, and Who Fixes It?
Six codes, straight from Chamberlain’s own diagnostic chart, with the one column no other page adds: whether the fix is yours, a part off the truck, or a technician’s call.
Swipe sideways to see the whole table.
| Flashes | What the opener found | Who fixes it | What it runs here |
|---|---|---|---|
| 1 | A sensor wire is broken, cut, or unplugged | You, if a wire has pulled out of its terminal; otherwise a technician | Nothing, or a wire run on a service visit |
| 2 | A shorted sensor wire, or black and white swapped at a terminal | A technician. The same code also means the LOCK button is on, which is yours | Nothing, or a service visit |
| 3 | The wall console or its wire is shorted, often a staple through the wire | A technician | A new console or a wire run, on a service visit |
| 4 | The sensors are out of line, or something crossed the beam for a moment | Yours, 10 minutes | Free. A new pair, if an eye has died, is $85 to $100 fitted |
| 5 | No motor rotation in the first second: the door is too heavy, locked, stuck, or the motor is overheated | You for the lock and the cool-down; a technician for the rest | A balance check, a spring, a gear kit at $130 to $280, or a capacitor |
| 6 | Motor circuit failure | A technician | A logic board, priced against a new opener |
Codes 1, 2 and 4 are all the sensor circuit, and on an opener made before 2022 they come with the bulbs flashing 10 times and the door refusing to close. Code 5 is the one that scares people and usually should not.
Chamberlain’s first instruction for it is to unplug the unit for 5 seconds. The next is to check whether the door is simply too heavy for the motor, which is a spring question rather than an opener question.
Code 6 is the honest one. Chamberlain’s chart says to replace the logic board because the motor itself rarely fails, and on an opener past 10 years old that board can approach what a new unit would cost.
How to Clear the Common Codes: Five Free Checks, in Order
- The LOCK button. On the wall console, a padlock icon. Pressed by a child or an elbow, it locks out every remote while the console still works, and the opener bulbs flash twice. Hold it for a few seconds to clear it.
- The beam. Stand in the doorway and look along the floor between the two eyes. A hose, a bag of mulch, or leaves blown under the door breaks it.
- The lenses. A dry cloth over each eye. No spray.
- The aim. Loosen the wing nut on the eye whose light is dim or flickering, swing it until the light holds steady, and tighten. Chamberlain says to check that the track the bracket is bolted to is firm, because a loose track moves the eye every time the door runs.
- The reboot. Pull the opener’s plug for a minute and plug it back in. That clears a code the board is holding from an earlier fault and keeps every remote and setting.
If the count changes after those five, you have learned something. When a 4 becomes nothing, the aim was the fault. A 4 that becomes a 1 or a 2 is the wire, and that is where the home checks end.
Genie Codes: Two Different Systems
Genie does not use the LiftMaster numbers, and its two product lines do not even use the same light. A Genie chain-drive or belt-drive has a red LED and a green LED side by side on the motor head. The Excelerator screw-drive has one status light under the lens cover and an eight-code chart of its own.
Swipe sideways to see the whole table.
| Genie light | Flashes | What it found | Who fixes it |
|---|---|---|---|
| Red LED, chain or belt drive | 1 | No remote is programmed | You, by pairing the remote |
| Green LED, chain or belt drive | 1 | Something crossed the beam, the door is binding, or the travel limits need setting | You for the beam; a technician for binding and limits |
| Green LED, chain or belt drive | 2 | A constant obstruction, misaligned Safe-T-Beams, or loose wiring at the head | You for the beam and the aim; a technician for the wiring |
| Green LED, chain or belt drive | 3 | The travel limits are set backwards | A technician |
| Green LED, chain or belt drive | 4 | Wall console wires reversed or shorted | A technician |
| Green LED, chain or belt drive | 5 | Chain or belt too tight, or the control board | A technician |
| Status LED, Excelerator | 3 | Overheated or over-cycled. Do not unplug it; it earns back 5 cycles every 10 minutes of rest | You, by waiting |
| Status LED, Excelerator | 1, 2, 4 to 8 | Motor board, controller board, force setting, Safe-T-Beams, console, limit switches, console locked | A technician, except the lock and the beams |
Genie’s vacation lock is called Sure-Lock, and it shows as a red light held steady on the wall console. Hold the lock button about 5 seconds to clear it.
The Safe-T-Beam LED should glow a steady red. A flashing red on the sensor itself means the pair has a fault, and Genie’s chart says to look for a second set of photo eyes of any brand nearby, since a neighbor’s beam can confuse them.
Why the Same Code Shows Up in St. Charles Garages
Three codes come with a season attached around here, and knowing the season saves a service call.
- A 4 that only shows up late in the afternoon. On a west-facing door in O’Fallon or St. Peters, low winter sun reaches the receiving eye for an hour before dusk. Chamberlain names sunlight into the green receiving eye as a cause of a false sensor fault. A sun hood on that eye, or swapping the pair so the sender faces the sun, ends it.
- A 1 or a 2 after a wet summer. The sensor wire’s bare ends sit in a terminal block on the motor unit, and a humid August in an unheated garage corrodes them. The opener reads a corroded terminal as a broken or shorted wire. A technician strips and reseats the wire, or runs a new one.
- A 5 on the first hard-freeze morning. The grease on a chain or a screw drive stiffens in the cold, the motor works harder against the same door, and if it cannot turn in the first second the opener posts a 5. One that was already heavy on a tired spring tips over the line on a 15-degree morning. The spring is the fix, not the opener.
One more thing the pages Google quotes keep getting backwards, including the franchise page that ranks first for this search. On a LiftMaster pair the amber light is the eye that sends and the green light is the eye that receives.
Chamberlain’s own page says so. If a page tells you the green one sends, it has the two swapped and so will its aiming advice.
Where the Home Checks End, and What the Technician Does Next

A door that will not close with no code showing is not for this page. That symptom has its own page, the garage door will not close guide, which covers the wall-button test and the travel and force settings. An opener that is dead with no light at all belongs to the garage door opener troubleshooting guide, which starts at the outlet.
We read all five top-ranked pages for this search, and we found that four print the same test. It means pulling the wall console off the wall and touching its two wires together, or shorting the red and white terminals on the motor unit with a jumper. Chamberlain’s chart includes it, and Chamberlain also says it does nothing on a Security+ 2.0 unit.
Nothing above asks you to open a terminal block, pull a cover, or touch a capacitor, and that is where the home checks end.
When to call: a 1, 2, 3, 5 or 6 that survives the reboot, a 4 that will not hold steady, or any code on an opener that also hums or grinds. A technician on a blinking-light call works it in this order:
- Read the code and the label together. The model number picks the chart, and the chart picks the part.
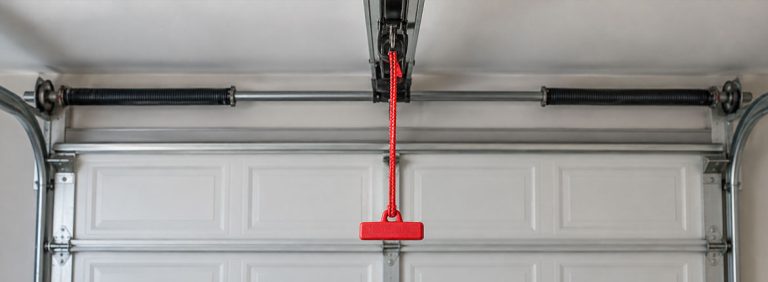
- Balance test on a 5. Red cord, door lifted 3 to 4 feet by hand and released. A door that drops or climbs is a spring job first, and no board swap fixes a door the motor cannot lift.
- The sensor circuit with a meter. Each eye connected on its own to find a dead eye versus a dead wire, the terminals cleaned, polarity checked, a new pair fitted if an eye has failed.
- The console and its wire on a 3. Replaced rather than bypassed.
- Inside the unit on a 5 or 6. White plastic shavings mean the drive gear; a hum with good gears means the capacitor; a unit that will not run at all means the board. Each is priced before it is touched.
- Travel, force and the reversal tests. After any part changes, the limits are set and the door is run against a 2×4 laid flat, because a repaired opener that does not reverse is not repaired.
Ten to 15 years is an opener’s working life, and the opener repair page’s own repair-or-replace table lands a unit past 10 years with failed safety features on the replace side. When I quote a 6, the age of the unit decides it before the board price does.
A new LiftMaster or Genie starts near $375, and a board on a 15-year-old unit buys you a 15-year-old opener. The LiftMaster openers and Genie openers pages list what we carry.
What Does a Blinking Code Cost to Fix in St. Charles?
How much does it cost? Codes 4 and the LOCK button cost nothing.
Our opener troubleshooting guide’s price table has the parts: photo eyes $85 to $100 a pair fitted, a gear kit $130 to $280, and $65 to $385 for an opener repair of any kind. A logic board is priced on the visit, and the garage door opener repair cost guide breaks the parts down one by one.
A same-day visit is listed on the opener repair page along with a free quote. How long does it take? One visit, usually, since the parts a code names ride on the truck.
The garage door maintenance visit’s 25-point inspection includes the sensor test and the force limits, which is the cheap way to catch a 4 before it becomes a 1.
Common Questions About a Blinking Garage Door Opener Light
Turning the Light Off for Good
Call (636) 577-1430 with the count, the light, and the brand on the label. That is enough for the technician to load the right sensor pair, console or board, and you hear the price before any work starts.
Want to check us out first? Gateway’s Better Business Bureau profile carries an A+ rating. The company is veteran-owned and family-run, and customer stories sit on the reviews page.
A code on a door that still opens can wait for a daytime visit. A door that opens by itself with no code showing is a different fault, covered in the garage door opens on its own guide. Fill in the free estimate form and the office will phone you with a time.